When it comes to computer peripherals, there are many options available. From mice to headsets, keyboards to webcams, there is an endless array of accessories that can help you customize and personalize your computing experience. Among these, one category stands out as particularly popular right now: custom mechanical keyboards. These are keyboards that are built from scratch, with each switch and keycap chosen and arranged to suit the user's individual preferences. If you are interested in building your own custom mechanical keyboard, this guide will show you how to get started.

Custom Mechanical Keyboard

Choosing Your Switches

Choosing Switches

The first step to building your custom mechanical keyboard is to choose the switches that will form the basis for your keyboard's typing experience. Switches are the small, spring-loaded mechanisms that sit beneath each of the keys on a keyboard, and they are responsible for the tactile feedback and resistance that you feel when you type. There are many different types of switches available, and each has its own unique feel and sound. Some popular choices include Cherry MX switches, Gateron switches, and Kailh switches.

Picking Your Keycaps

Picking Keycaps

Once you have chosen your switches, the next step is to select the keycaps that you will use on your keyboard. Keycaps are the small, removable pieces that sit on top of the switches and provide a surface for your fingers to press. Like switches, keycaps come in many different shapes, sizes, and materials, and choosing the right ones can make a big difference in the feel and appearance of your custom mechanical keyboard. Some popular materials for keycaps include ABS plastic, PBT plastic, and even metal.

Building Your Keyboard

Building Keyboard

Once you have chosen your switches and keycaps, the next step is to begin assembling your custom mechanical keyboard. This may involve soldering your switches and keycaps onto a printed circuit board (PCB), or it may involve using a hot-swappable PCB that allows you to easily swap out switches and keycaps without any specialized tools or skills. There are many different resources available online that can help guide you through the process of building your custom mechanical keyboard, and many enthusiasts enjoy sharing their experiences and knowledge with others.

Customizing Your Keyboard

Customizing Keyboard

One of the greatest benefits of building your own custom mechanical keyboard is the ability to customize it to your own unique preferences. This may involve adding specialized keycaps or switches for specific functions, such as media controls or gaming macros. It may also involve customizing the layout of your keyboard, arranging the keys in a way that suits your own typing style and ergonomic needs. In addition to these practical considerations, many custom mechanical keyboard enthusiasts also enjoy customizing the appearance of their keyboards, often by using colorful or artistic keycaps, custom lighting effects, and other visual modifications.

Maintaining Your Keyboard

Maintaining Keyboard

Once you have built and customized your custom mechanical keyboard, it is important to maintain it properly in order to ensure a long and healthy lifespan. This may involve regular cleaning and maintenance of the switches, keycaps, and other components, as well as periodically checking for any signs of wear or damage. With proper care and attention, your custom mechanical keyboard can provide years of reliable and enjoyable use, while also reflecting your own unique personality and style.

Conclusion

Building your own custom mechanical keyboard can be a rewarding and enjoyable experience, allowing you to create a truly unique and personalized computing accessory. By choosing the right switches, keycaps, and other components, and assembling them with care and precision, you can create a keyboard that suits your individual needs and preferences perfectly. So why not give it a try? With a little bit of time, effort, and creativity, you can join the growing community of custom mechanical keyboard enthusiasts and take your typing experience to the next level.


Spring break is just around the corner and you know what that means – it's time to update your closet with some fresh and funky clothing styles! Who says you have to spend a fortune on clothes when you can shop for the latest trends at a bargain price? We've rounded up some of the best spring break-approved outfits to keep you stylish and on-budget!

Urban Boutique Bodycon Dress

This first look features an amazing Urban Boutique bodycon dress that's perfect for a night out on the town. The dress hugs your curves in all the right places and the bright and bold colors scream "I'm ready to party!" Whether you're heading to a club or just hanging with friends, this dress will definitely get you noticed. And the best part? It's affordable and won't break the bank!

Urban Boutique Bodycon Dress

Inexpensive Summer Dresses

Next up, we have some amazing summer dresses that won't put a dent in your wallet. Who says you need to spend a fortune on clothing to look cute? From floral prints to bold stripes, these dresses are perfect for any occasion. Whether you're headed to the beach or just enjoying a day out with friends, these dresses are sure to impress. So why not add a few to your wardrobe and be prepared for any adventure this spring break?

Inexpensive Summer Dresses

Spring Break Dress

If you're looking for a more simple and chic look, this spring break dress is perfect for you. It's light and airy, so you can stay cool and comfortable all day long. And the soft, pastel colors are just right for this time of the year. You can pair it with sandals for a casual day out or dress it up with heels for a night on the town. And at such a great price, you won't want to miss out on this spring break essential!

Spring Break Dress

Your IG-Approved Dresses

Want to take your Instagram game to the next level this spring break? These dresses are guaranteed to get you all the likes and followers you need to become the next big influencer. From floral patterns to vibrant prints, these dresses are perfect for a stylish and trendy vacation. Whether you're lounging on the beach or exploring the city, these dresses are sure to make a statement. So why wait? Start shopping now and get ready to be the talk of the town.

Your IG-Approved Dresses

Spring Break Style

Looking for even more style inspiration? Check out our top picks for spring break style! From crop tops to shorts, we've got everything you need to stay trendy and fashionable this season. Whether you're headed on vacation or just want to update your wardrobe, these styles are guaranteed to make a statement. So why wait? Start shopping now and get ready to show off your spring break style!

Spring Break Style

Spring break is the perfect time to experiment with different styles and trends. And with these affordable and chic looks, you won't have to break the bank to stay fashionable. So why wait? Start shopping now and get ready to rock your spring break style!


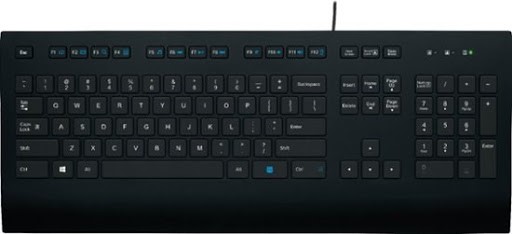
Have you ever wondered about the different types of keyboards available in the market today? You may have heard about mechanical keyboards, but there's another type of keyboard that you should know about - the membrane keyboard.

membrane keyboard

What is a Membrane Keyboard?

A membrane keyboard, also known as a rubber dome keyboard, is a type of keyboard that uses a flat, flexible surface made of silicone rubber or similar material as the main switching mechanism for registering keystrokes. The membrane keyboard design was first introduced in the 1980s by a company called Key Tronic, to provide a cheaper and more reliable alternative to the bulky mechanical keyboards that were commonly used at the time.

membrane keyboard design

One of the main advantages of a membrane keyboard is its low profile and compact size. The use of a single membrane sheet as the keyswitch mechanism allows for a very thin keyboard design, making it ideal for use in laptops and other portable devices. The membrane keyboard is also much quieter than a mechanical keyboard, as there are no individual switches that need to be pressed and released with a clicking sound. This can be beneficial in environments where noise levels are a concern.

How to Distinguish a Membrane Keyboard from a Mechanical Keyboard

At first glance, it may be difficult to distinguish between a membrane keyboard and a mechanical keyboard, as both types can look similar in appearance. However, there are some key differences that can help you identify which type of keyboard you are working with:

differences between mechanical and membrane keyboard

1. Check the Keystroke Feel

A mechanical keyboard provides tactile and audible feedback with each keystroke, giving the user a more satisfying and responsive typing experience. Membrane keyboards, on the other hand, have a mushy, soft feel to the keys, and they do not provide the same level of feedback as mechanical keyboards.

mechanical keyboard typing

2. Look for Individual Switches

Another way to distinguish between a membrane keyboard and a mechanical keyboard is to examine the underside of the keycaps. A mechanical keyboard will have individual switches that are visible beneath each keycap, while a membrane keyboard will not have any visible switches.

individual switches mechanical keyboard

3. Measure the Thickness

A mechanical keyboard is generally thicker and heavier than a membrane keyboard, due to the individual switches and other components used in its construction. If you're unsure about the type of keyboard you're using, try measuring its thickness and weight to determine whether it's a mechanical or membrane keyboard.

keyboard thickness

Conclusion

Now that you know what a membrane keyboard is and how to distinguish it from a mechanical keyboard, you can make a more informed decision when choosing a keyboard for your needs. Whether you prefer the tactile feedback of a mechanical keyboard or the slim profile and quiet operation of a membrane keyboard, there is a keyboard out there that will suit your preferences.


Are you having trouble connecting to WiFi on your laptop? Don't worry, we've got you covered with some easy fixes for Windows 7, 8, and 10.

Laptop WiFi Connection Problem Fix

Check Your Network Settings

Check Your Network Settings

The first step in fixing WiFi connection problems is to check your network settings.

Make sure that your laptop is set up to automatically connect to available networks. You can do this by going to the Network and Sharing Center in your Control Panel, and then clicking on "Change adapter settings."

From there, right-click on your wireless network adapter and select "Properties." Under the "Networking" tab, make sure that the "Client for Microsoft Networks" and "File and Printer Sharing for Microsoft Networks" boxes are checked.

Restart Your Router and Laptop

Restart Your Router and Laptop

If your network settings look okay, the next step is to restart your router and laptop.

Turn off your router and unplug it from the power source. Then, wait at least 30 seconds before plugging it back in and turning it on again.

Do the same with your laptop. Shut it down completely, wait a few seconds, and then turn it back on again.

Update Your Wi-Fi Driver

Update Your Wi-Fi Driver

If restarting your devices doesn't work, you may need to update your Wi-Fi driver.

You can do this by going into your Device Manager and finding the network adapter. Right-click on it and select "Update Driver Software." From there, you can choose to automatically search for driver updates, or download the latest driver from the manufacturer's website.

Reset Your Network Settings

Reset Your Network Settings

If none of the above methods work, you can try resetting your network settings.

Go to the Network and Sharing Center in your Control Panel and click on "Internet Options." From there, click on "Advanced," and then select "Reset." This will reset all of your network settings to their default values.

Conclusion

There you have it - some easy fixes for your laptop's Wi-Fi connection problems. By checking your network settings, restarting your devices, updating your Wi-Fi driver, or resetting your network settings, you should be able to get back online in no time.


Have you been struggling with your laptop not connecting to wifi? It can be a frustrating experience, especially when you base most of your work or entertainment online. Fret not, for we have got you covered! In this article, we will provide a step-by-step guide on how to fix this issue, ensuring that you can connect to the internet seamlessly.

Laptop not connecting to Wifi image

Check your Wifi connections

Before diving into the complicated solutions, it is always advisable to check your wifi connections. Ensure that your laptop is within the range of the wifi signal. Additionally, if you are using a router, ensure that it is functional by checking if other devices can connect to it. Try rebooting the router if necessary.

check wifi connections

Restart your laptop

If your laptop was working fine before and suddenly stopped connecting to wifi, try restarting it. This simple fix can often solve the problem by resetting your network adapter.

Restart laptop

Update network drivers

Outdated network drivers can be a possible cause of your laptop not connecting to the internet. Updating your network drivers can solve this issue. You can download the latest drivers from your laptop manufacturer's website.

update network drivers

Disable and re-enable network adapter

Disabling and re-enabling your network adapter can recreate the connection and solve the problem. Go to the Control Panel, then Network and Sharing Center, select Change adapter settings, right-click on the network adapter, choose Disable, wait for a minute or two, and then Enable it again.

Disable and re-enable network adapter

Renew IP address

Renewing your IP address can sometimes fix the issue of your laptop not connecting to wifi. Open Command Prompt and enter the following commands in order: ipconfig/release, ipconfig/renew, netsh winsock reset.

Renew IP address

Reset network settings

Resetting your network settings can revert them to their default state, which can fix the issue of your laptop not connecting to wifi. Go to the Control Panel, then Network and Sharing Center, choose Internet Options, click on Advanced, and then select the Reset button.

Reset network settings

Conclusion

In conclusion, a laptop not connecting to wifi can be a frustrating issue to deal with, but there are several solutions available to solve the problem. Before trying the complicated solutions, ensure that your laptop is within the range of the wifi signal and check your router's functionality. If the issue persists, try restarting your laptop, updating your network drivers, disabling and re-enabling your network adapter, renewing your IP address, or resetting your network settings. We hope that this guide has been informative and helpful in solving your wifi connection issues.


Are you having trouble with your laptop running slow? It can be frustrating, but don't worry! There are a variety of reasons why your laptop might be struggling and we are going to give you some tips on how to fix it.

laptop running slow

Too Many Programs Running

Too Many Programs Running

Having too many programs running at the same time can cause your laptop to slow down. To prevent this, try to close any programs that are not in use. This will free up some memory and speed up your laptop.

Not Enough Storage Space

Not Enough Storage Space

If your laptop is running out of storage space, it can slow down your system. It's important to clear out any unnecessary files and programs that you don't need. Additionally, consider upgrading your hard drive or transferring files to an external storage device.

Outdated Software or Operating System

Outdated Software or Operating System

If your laptop's software or operating system is out of date, it may not be able to handle newer programs and applications. Make sure you regularly update your software and operating system to ensure that your laptop is running efficiently.

Malware or Viruses

Malware or Viruses

If your laptop has been infected with malware or viruses, it can seriously slow down your system. Install antivirus software and scan your laptop for any malicious programs.

Dusty or Dirty Hardware

Dusty or Dirty Hardware

Over time, dust and dirt can accumulate on your laptop's hardware, causing it to overheat and slow down. Regularly clean your laptop's hardware to keep it running efficiently.

Low RAM

Low RAM

If your laptop has low RAM (Random Access Memory), it can slow down your system. Consider upgrading your RAM to speed up your laptop.

Background Programs

Background Programs

Background programs can also cause your laptop to slow down. Make sure to close any programs running in the background that you are not actively using.

Bad Battery Life

Bad Battery Life

If your laptop's battery life is low, it can cause your system to run slowly. Consider replacing your battery or keeping your laptop plugged in while in use.

Conclusion

Overall, there are many factors that can cause your laptop to slow down. By following these tips and regularly maintaining your laptop, you can keep it running efficiently and effectively. Don't let a slow laptop hold you back anymore!


Yo, listen up. We all know how annoying it is when your sink or washing machine drain gets clogged up. Ain't nobody got time for that! Lucky for you, I've got some tips to help you clear that mess up quick and easy.

How to easily and quickly clear a clogged bathroom sink drain

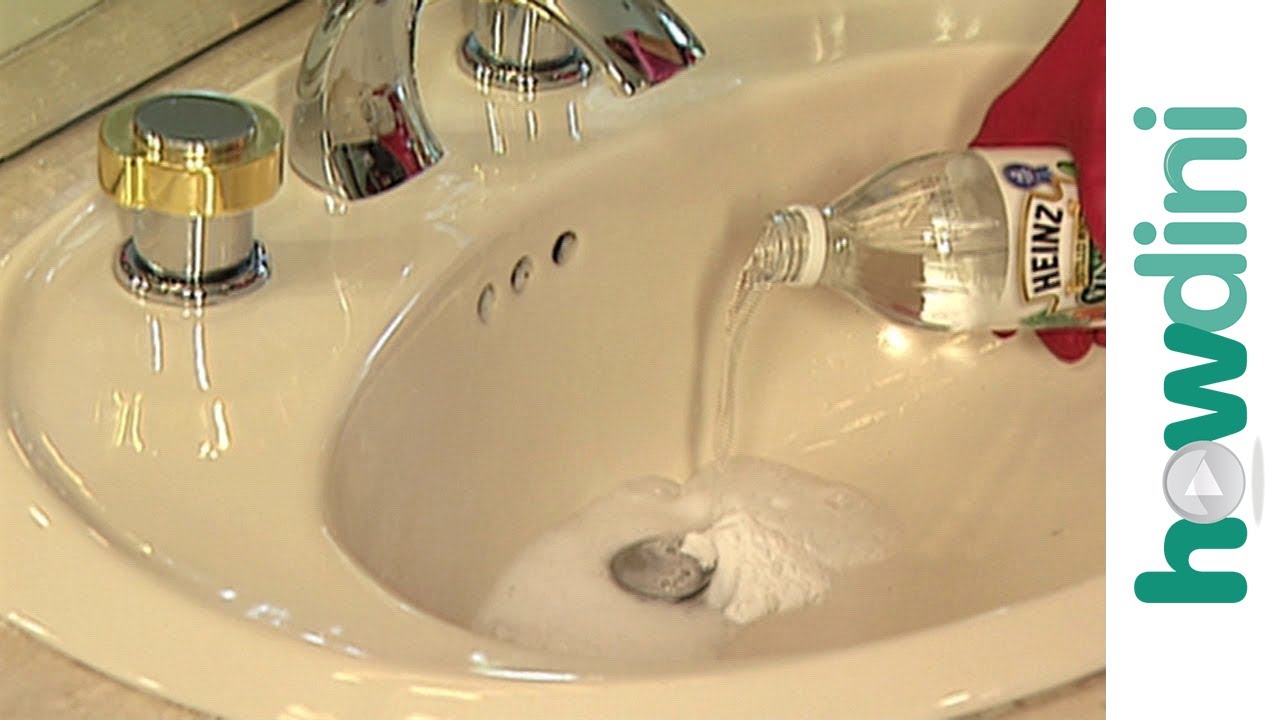
First up, we got the clogged bathroom sink drain. This is a common problem that can often be fixed without calling in a plumber. Check out this image I found:

clogged bathroom sink drain

So, what do you do? Simple. Get some baking soda and vinegar. Pour a cup of baking soda down the drain, then follow it up with a cup of vinegar. Cover the drain with a plug or cloth, and wait for about 5 minutes. After that, pour hot water down the drain. Boom! Your drain should be cleared up.

How do you unclog a washing machine drain?

Next up, we got a clogged washing machine drain. This one can be a bit tricky, but fear not, I got you covered. Check out this image:

clogged washing machine drain

First, you need to unplug your washing machine. Then, you gotta locate the drain pipe at the back of the machine. Get a bucket ready, 'cause you're gonna need it. Disconnect the drain hose from the back of the machine, and aim it into the bucket. Let any water still in the machine drain out.

Next, you need to clean out the hose. You can use a plumbing snake to remove anything clogging it up. If you don't have a snake, try using a wire hanger. Once it's cleared, reattach the hose to the machine and plug it back in. Test it out with a load of laundry and see if the problem is solved.

Drain on double sink is clogged (Draino not working). How do I go about

Lastly, we got a double sink drain that's clogged up and even Draino ain't cutting it. No worries, fam. Check out this image:

clogged double sink drain

There's a few things you can try here. Get some gloves and a bucket ready. First, try using a plunger on one of the sinks. If there's too much water in the other sink, cover it up with a towel.

If that doesn't work, remove the trap under the sink. It's the U-shaped pipe that connects the sink to the drain. You might need a wrench for this. Put the bucket underneath to catch any water, and carefully remove the trap. Clean it out, then reattach it. Test it out and see if it worked.

If all else fails, you might have to call in a plumber. But hopefully, one of these methods worked for you.

So there you have it, folks. Some simple and effective ways to clear up those pesky clogged drains. No need to stress and no need to spend unnecessary money on a plumber. Give these a try and let me know if it worked for you.


Everyone has experienced the frustration of a noisy appliance, and it seems like the sound is always happening at the most inconvenient times. Luckily, with a little know-how and some patience, most of these obnoxious sounds can be eliminated. Here are three common household noises and how to get rid of them:

Noisy Brakes

Fix Noisy Brakes

If your car's brakes are squeaking or grinding when you apply them, it's time to address the noise. Start by checking your brake pads for wear and tear, as this could be the cause of the noise. If the pads are in good condition, try lubricating the caliper slides and backing plates with a high-temperature brake grease to eliminate the sound. If that doesn't work, it might be time to replace your brakes altogether.

Noisy Refrigerator

Fix Noisy Refrigerator

A noisy refrigerator can be a major annoyance, but it's usually an easy fix. Start by pulling the fridge away from the wall and checking for any loose parts. If everything is secure, the noise is likely coming from the evaporator fan, which can become clogged with ice or debris over time. Turn off the power to your fridge and remove the back panel to access the fan. Clean it thoroughly and ensure it's functioning properly before putting everything back together.

Annoying Home Noises

Annoying Home Noises

If you're sick and tired of hearing random noises around your house, it's time to take action. Here are a few common sounds and their solutions:

  • Creaky Floorboards: Sprinkle talcum powder or graphite powder between the creaky boards to quiet them down.
  • Squeaky Door Hinges: Apply a drop of oil or WD-40 to the hinges to lubricate them and eliminate the noise.
  • Dripping Faucets: Tighten the faucet's packing nut or replace the worn-out washer to stop the drip-drip-drip.
  • Banging Pipes: Install foam insulation around your pipes to reduce the sound of water hammer.

Noise can be a major source of stress and irritation, but thankfully, most sounds can be eliminated with a little DIY know-how. Whether you're dealing with squeaky brakes, a noisy fridge, or just a bunch of random sounds around your house, don't hesitate to take action and put an end to the noise once and for all.


Have you ever had the misfortune of opening up your fridge only to find that it's not working properly? Maybe it's not staying cold, or maybe it's making strange noises. Whatever the case may be, a broken refrigerator can be a major inconvenience for anyone to deal with. But don't worry - there are plenty of reliable appliance repair companies out there that can help you get your fridge back up and running in no time.

Appliance Repair in Gilbert, AZ

Broken Refrigerator

If you're located in the Gilbert area, you can count on the team at Appliance Repair Gilbert to provide you with fast and accurate repairs. Whether your fridge needs a simple tune-up or a more extensive repair, they have the knowledge and expertise to get the job done right the first time around. So why wait? Call today and get your fridge back to working at its best.

Appliance Repair in Easton, CT

Broken Refrigerator

Of course, Gilbert isn't the only place where you can find top-notch appliance repair services. If you're in the Easton area, then Appliance Repair Express is the company to turn to. With over 20 years of experience in the industry, their technicians have seen it all when it comes to broken fridges. No matter what kind of issue you're dealing with, they have the skills and tools to fix it quickly and efficiently.

Fridge Repair & Regas in South Africa

Broken Refrigerator

And let's not forget about our friends across the pond in South Africa. Larian Appliance Repairs offers fridge repair and regas services that are quick, affordable, and always come with a 10% cash discount. So if you're dealing with a broken fridge and you're in the Johannesburg area, be sure to give them a call and see what they can do for you.

At the end of the day, it doesn't matter where you live or what kind of fridge you have - when it breaks down, you need reliable and trustworthy repair services to get it fixed. So don't hesitate to reach out to any of these companies if you're dealing with a broken fridge. They have the experience, knowledge, and dedication to provide you with the best possible repair services and get your fridge back to working perfectly in no time.


Basement leaks can be a major issue for many homeowners, resulting in costly repairs and potential damage to personal property. Fortunately, with a little bit of knowledge and some DIY skills, you can fix these leaks and protect your home. We've gathered a few helpful tips and tricks to help you become a basement leak repair expert.

Identify the Source

The first step to fixing a basement leak is identifying the source of the problem. While leaks are often caused by cracks in the walls or foundation, they can also be caused by issues with the plumbing or external drainage. Take a close look at your basement to see if you can identify any obvious sources of moisture. If you're having trouble locating the leak, it's best to consult with a professional to avoid causing even more damage.

Repair Cracks in the Walls or Foundation

If you've identified cracks in your basement walls or foundation as the source of your leak, it's important to act quickly to repair them. You can purchase sealants and epoxies specifically designed for this purpose at most hardware stores. Follow the instructions carefully to properly seal the crack and prevent moisture from seeping through. If you're dealing with a larger crack or a more serious issue with your foundation, it's best to consult with a contractor who specializes in foundation repair.

Basement Leak Repair

One thing to keep in mind when repairing cracks in your basement walls or foundation is that you may need to address any underlying drainage or grading issues in order to prevent future leaks. This may involve rerouting downspouts or regrading soil around the foundation.

Install a Backup Sump Pump

If your basement is prone to flooding, even after you've repaired any cracks, it may be a good idea to install a backup sump pump. This device can help to prevent flooding in the event that your primary sump pump fails or if there is a power outage. There are several different types of backup sump pumps available, including battery-powered and water-powered options.

Seal Plumbing Penetrations

In some cases, leaks in your basement may be caused by gaps around plumbing pipes that pass through concrete walls or floors. These gaps can allow moisture to seep through and cause damage over time. To prevent this from happening, it's important to properly seal plumbing penetrations with a waterproof sealant. You can also install backing material like foam backer rod to help ensure a tight fit.

How To Fix Leaky Basement

Address External Drainage Issues

If your basement leak is caused by poor external drainage, you may need to take steps to improve the way water is flowing away from your home. This could involve installing a French drain or directing downspouts further away from the foundation. You may also need to regrade the soil around your home to ensure that water is flowing away from the foundation instead of towards it.

Install a Dehumidifier

If your basement is constantly damp or humid, even after you've fixed any leaks, it's important to address this issue as well. Installing a dehumidifier can help to remove excess moisture from the air and prevent mold, mildew, and other issues from developing. There are several different types of dehumidifiers available, including portable units and whole-house systems.

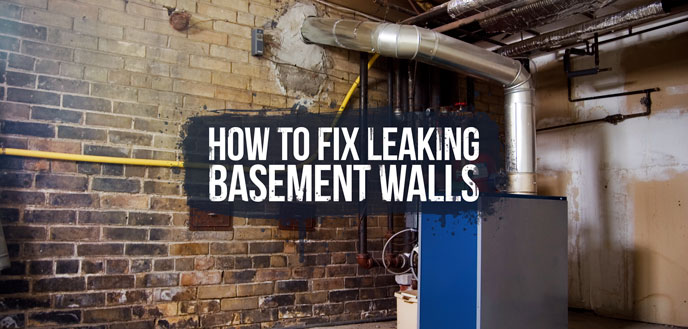
How to Stop Leaking Basement Walls

By following these tips and taking steps to prevent future leaks, you can protect your home and avoid costly repairs. Keep in mind that some repairs may require the help of a professional, so don't hesitate to reach out for assistance if needed. With a little bit of effort and know-how, you can become a basement leak repair expert in no time!


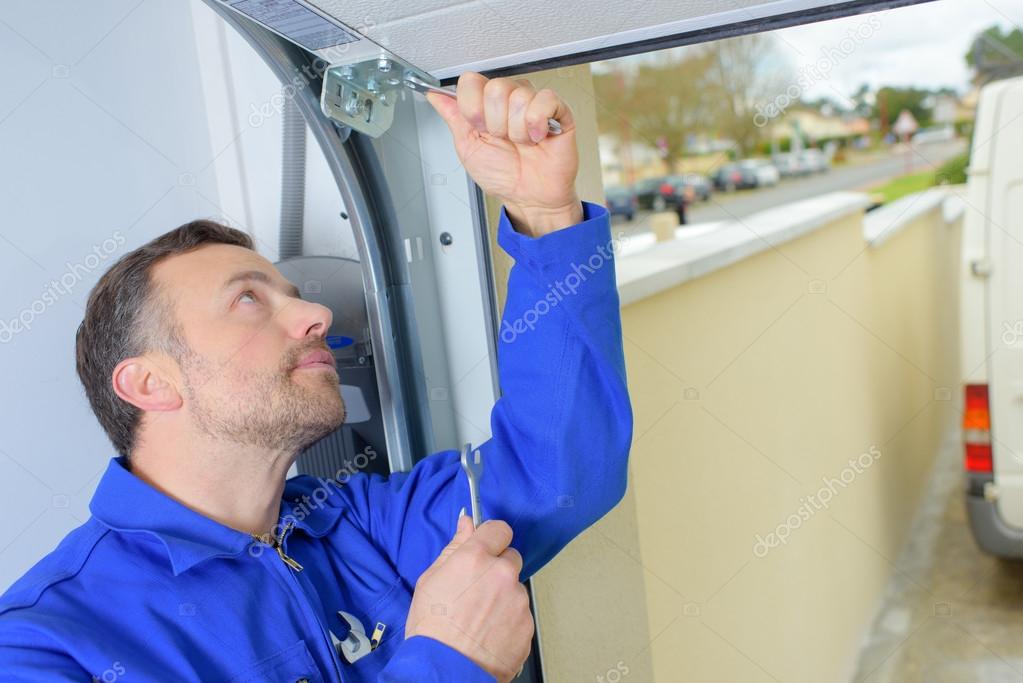
Are you tired of dealing with a broken screen door? Let us help you with our expert fixing services. Our team specializes in repairing all kinds of doors, including screen doors, and we guarantee quality work that will last for years. Take a look at some of our recent projects:

Fixing screen door mesh

Screen door mesh being repaired

One common issue that homeowners face with their screen doors is a damaged mesh. This can be caused by pets, children, or even inclement weather. In this project, our skilled team replaced the damaged mesh with a high-quality, durable material that will withstand wear and tear over time. No more pesky bugs or debris entering your home!

Fixing a Broken Screen Door

Broken screen door being fixed

A broken screen door can be a headache for any homeowner. In this project, our team was able to fix the damaged door quickly and efficiently, ensuring maximum security and convenience for the homeowner. We use only the best materials on the market to guarantee a job done right.

Fixing a Damaged Door

Damaged door being repaired

Even a small crack or chip in your door can lead to bigger problems down the road, that's why our team is always ready to help with any kind of door repair needs. In this project, we restored a damaged door with precision and expertise to ensure long-lasting protection and aesthetic appeal. Trust us to get the job done right, every time.

Don't let a broken screen door or damaged door be a problem in your home. Call us today to get started on your door repair project and experience the best service in the business. We take pride in our work and guarantee your complete satisfaction with our services. Let us help you to improve the safety and look of your home.


Free How-To Tutorials

Search This Blog

Menu Halaman Statis